| Methode Champenoise for Beer |
| (with photos of a Disgorgement and a Dosage) by Drew Beechum and Kent Fletcher |
| (As Featured in Zymurgy - May/June 2006) |
  |
| The Brut labels with apologies to Eric Sena. |
| Take me to the recipes! | ||||||||||||||||||||||||||||||||||||||||||||||
| Take me to the pictures | ||||||||||||||||||||||||||||||||||||||||||||||
| Take me to the movies | ||||||||||||||||||||||||||||||||||||||||||||||
| Take me to the Tasting Notes! | ||||||||||||||||||||||||||||||||||||||||||||||
|
In 2003, a brand new Belgian beer hit the market in Los Angeles for the first time, DeuS de Bosteels. The beer comes packaged in champagne bottles with champagne corks and the first set of labels were so close to Dom Periginon, they were forced to change them for the second release. DeuS is a fascinating beer. Brewed in Belgium at the Bosteels Brewery. It is then shipped to the Champagne region of France to undergo the full Methode Champenoise to transform the beer from something interesting to something special. There is only one other brewery doing something similiar, Malheur Brut by Brouwerij de Landtsheer. That something special, a beer: bright and bubbly; redolent of lavender, bergamot, cardamom and other exotic spices; incredibly crisp, but still lightly sweet. The beer inspires wild reactions it as witnessed on BeerAdvocate.com. Not the least of the factors causing a reaction from reviewers is the priciness of this drop. A bottle here in Los Angeles averages $30 and ranges from $25 to over $60 (at a bar)! |
||||||||||||||||||||||||||||||||||||||||||||||
| Brewing the Beer | ||||||||||||||||||||||||||||||||||||||||||||||
|
A combination of the price, oddity of technique and obsession with DueS that led the usual Falcons' Brew Crew of Kent, Cullen, Jim and Drew to brew up a batch of something simliar, not a clone of DeuS, an homage. The beers are designed to ferment dry and produce a product coming out of secondary at around 10% ABV. This is ideal for any beverage undergoing the full methode champenoise to insure that your yeast is in good shape to ferment at pressure. BRUT DU FAUCON RECIPE FILE Bosteels claims not to spice the beer with any kettle spices, but we decided to spice ours to drive the strong lavendar notes in the aroma. The spices were added in the bottling process by steeping a mix of crushed spices and herbs in the initial priming sugar addition. We added cinnamon, lavendar, allspice, ginger and black pepper. The full recipe is available here BRUT DU FAUCON NOIR RECIPE FILE BRUT DU MARIAGE BRUT DU BEAUCOUP D'HOUBLON RECIPE FILE |
||||||||||||||||||||||||||||||||||||||||||||||
| Bottling and Riddling the Beer | ||||||||||||||||||||||||||||||||||||||||||||||
|
Beyond the brew day, Kent and Drew took charge of the fermentation process. After a 6 month ferment, the beer was bottled with a sugar syrup spiced with a mix of cinnamon, ginger, allspice, lavender and black pepper. These bottles were capped with crowns, and allowed to referment in the bottle for a period of a couple of months. The beer was primed at a rate sufficient to give us 3.5 volumes of CO2. Roughly 14 ounces (by weight) of sugar into 10 gallons of beer. This being our first time with this technique, we decided to go light on the carbonation to prevent busted bottles. In the future we'd recommend goin even higher if you want true "Champange" like carbonation. As the beer refermented, Kent (in charge of the bottles) began the process of riddling. Simply put, riddling is a strategic way of rotating and rolling the bottles with all the yeast sediment resting against the cap. Once the bottles were riddled, we let them age for a period while we learned how to disgorge the beer and took care of other club activities. |
||||||||||||||||||||||||||||||||||||||||||||||
| The Day of Disgorgement and Dosage | ||||||||||||||||||||||||||||||||||||||||||||||
|
The basic idea behind disgorgement and dosage is to freeze the riddle sediment in a small ice plug. Pop the crown cap and shoot the yeast/ice plug in a safe direction. The beer itself should now be relatively clear of all sediment. The beer is then topped up with a "dosage" to replace the missing volume. In champagne, this is typically a sugar syrup (or wine) dosed with Cognac and sulfite. In our project, we dosed with sugar syrup plain and spiced with lavender, ginger, allspice and cinnamon. Lastly, you cork, cage, rinse and foil the bottle. Traditional champagne corks are difficult to procure and require finese and tools to use. Fortunately, easy to use plastic champagne "corks" exist that require only a mallet for bottling. One additional complication, the whole disgorgement process from pop to cork should take you less than 10 seconds. Go, Speed Bottler, Go! |
||||||||||||||||||||||||||||||||||||||||||||||
| The Parts Needed: | ||||||||||||||||||||||||||||||||||||||||||||||
FREEZING PARTS TESTED UNTESTED HARDWARE SOFTWARE |
||||||||||||||||||||||||||||||||||||||||||||||
| Freezing the Neck | ||||||||||||||||||||||||||||||||||||||||||||||
|
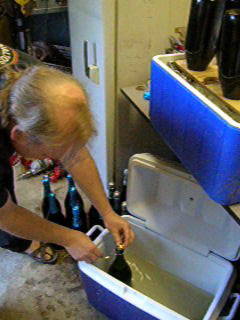
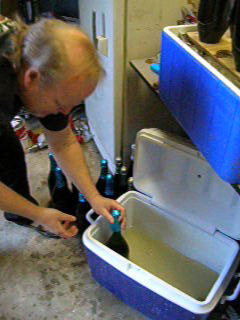
Disgorgement requires riddled bottles that are chilled to 35-40F. So the night before, set your riddled cases into the fridge or freezer to chill properly There are two forms of traditional disgorgment: Flying Disgorgement, a technique that requires precise timing of tilting the bottle and opening the crown. Not for amateurs; Ice Disgorgement, described above this is much easier for the amateur. For ice disgorgement the problem becomes how to freeze the neck quickly and easily. The traditional answer is an ice brine bath, which you'll see that Fletch and I attempted. Even after managing to drop the temp of the bath to 17 degrees Farenheit, the bottles wouldn't freeze. Fletch and I spent hours at trying to perfect this to no avail. The solution ended up being quick and simple and was provided to us by John Daume of the Home Beer Wine Cheesemaking Shop. Use a mixture of acetone and dry ice, for our pot to cover the right portion of the neck it took us ~1/2 gallon of acetone and 3 lbs of chipped dry ice, fed periodically to keep the mix cold. Combined, the mixture read below the scale of any of our thermometers, but according to one of the club's resident chemists, Matt Bourbeau, the mixture probably hit -75F. Pop your bottles into this mix for a period of 1-4 minutes and you have a perfectly frozen neck. Very Important: Don't let the neck freeze too long. If the ice plug grows below the "swell" of the neck, it won't shoot out when uncapped. You'll need to let it thaw (upside down preferably) and then refreeze. I think John, the winemaker, avoided telling us this trick just to watch the brewers struggle for a while! Please note: Acetone is not something you want to ingest. Make sure to carefully rinse the bottles of the acetone and don't let any of it get inside! An untested solution, also provided by Matt Bourbeau, chemist extraordinaire, might be safer. Replace the acetone and dry ice with a 1 to 1 mixture of water and ethanol. In many states, grain alcohol is sold at a maximum proof of 153. Roughly translated for 2 quarts of solution you need 2 750ml of 153 proof alcohol and a pint of water. Combined with dry ice, this mix only gets down to -40F, but it removes the worries of using Acetone near your beer. As of this writing, we still haven't tested this method. |
||||||||||||||||||||||||||||||||||||||||||||||
| Disgorging, Dosaging, Corking and Caging | ||||||||||||||||||||||||||||||||||||||||||||||
| Watch Drew Disgorge A Bottle! | ||||||||||||||||||||||||||||||||||||||||||||||
|
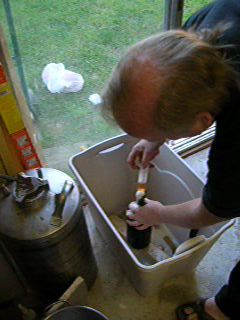
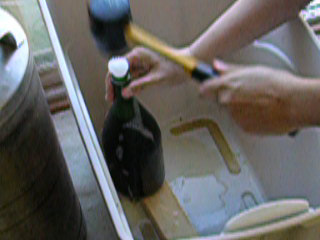
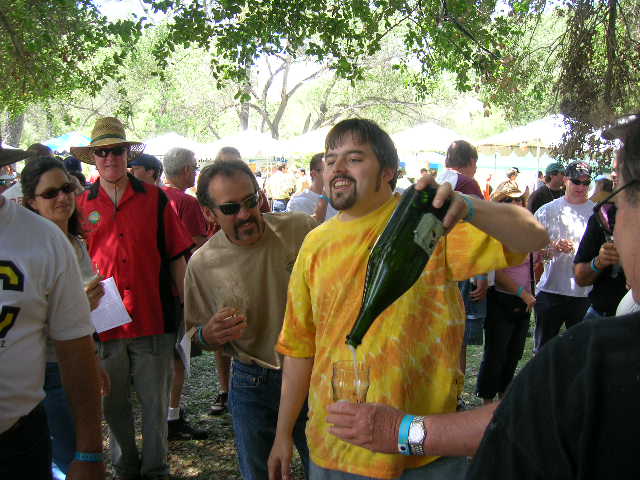
Once you have a frozen plug in the neck that traps the sediment, turn the bottle upright and point it somewhere safe and easy to clean (or outdoors). In a quick and lively fashion, pop the crown cap and watch the ice plug go flying. If it doesn't come flying immediately, be patient and give the bottle a slight bump. Once the bottle is clear, inject with the dosage solution. In our case it was 15ml per 750ml of 10% sugar solution (100gms of sugar in a liter of water, boiled to a liter). Half of the bottles received a dosage of spiced sugar solution at the same concentrations. After dosage, take a sanitized plastic cork and using a rubber mallet drive it home. Be careful not to break the bottle! Then add a wire cage and tighten it using a cage spinner, both should be available at a reasonably stocked homebrew store. All told, if you're moving at the right speed, those last steps should have taken you less than 10 seconds! For our bottles we added decorative foils to differenate the spiced from unspiced dosage bottles. (Silver = plain; Blue = Spiced) |
||||||||||||||||||||||||||||||||||||||||||||||
| Tasting Notes | ||||||||||||||||||||||||||||||||||||||||||||||
|
BRUT DU FAUCON Anticipation focused on the cork as Fletch unwrapped the foil and uncaged the bottle. Being in a public space, Kent carefully pulled the cork and kept it from flying off into the ceiling. Carefully poured into 8 tulip glasses, a nice frothy champagne mousse climbed towards the top of the glasses. Are we satisfied? Shoot.. we're already brewing the next one. |
||||||||||||||||||||||||||||||||||||||||||||||
| The Pictures | ||||||||||||||||||||||||||||||||||||||||||||||
|


